Authenticate using Google#
Warning
This documentation has not been updated recently, and a major version of OAuthenticator has been released since it was. Due to that, please only use this as a complement to the official OAuthenticator documentation.
Going onwards, the goal is to ensure we have good documentation in the OAuthenticator project and reference that instead of maintaining similar documentation in this project also.
The Google OAuthenticator lets users log into your JupyterHub using their
Google user ID / password. To do so, you’ll first need to register an
application with Google, and then provide information about this
application to your tljh configuration.
See Google’s documentation
on how to create OAUth 2.0 client credentials.
Note
You’ll need a Google account in order to complete these steps.
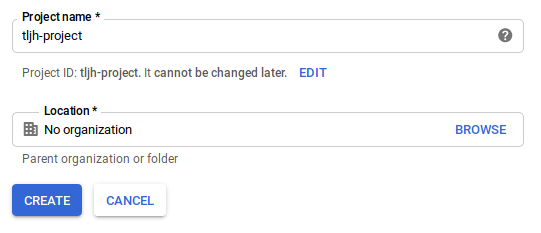
Step 1: Create a Google project#
Go to Google Developers Console and create a new project:
Step 2: Set up a Google OAuth client ID and secret#
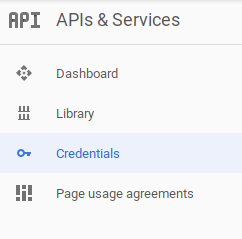
After creating and selecting the project:
Go to the credentials menu:
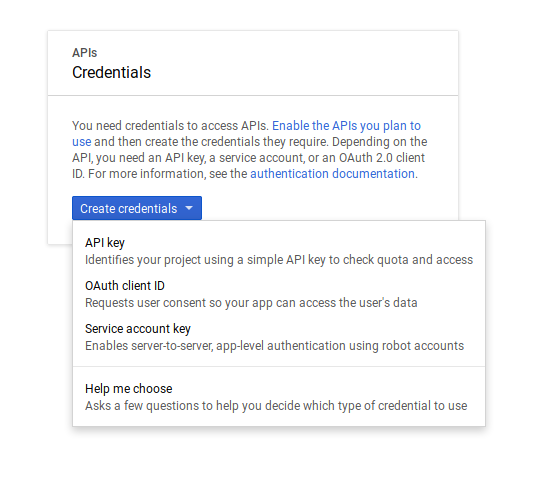
Click “Create credentials” and from the dropdown menu select “OAuth client ID”:
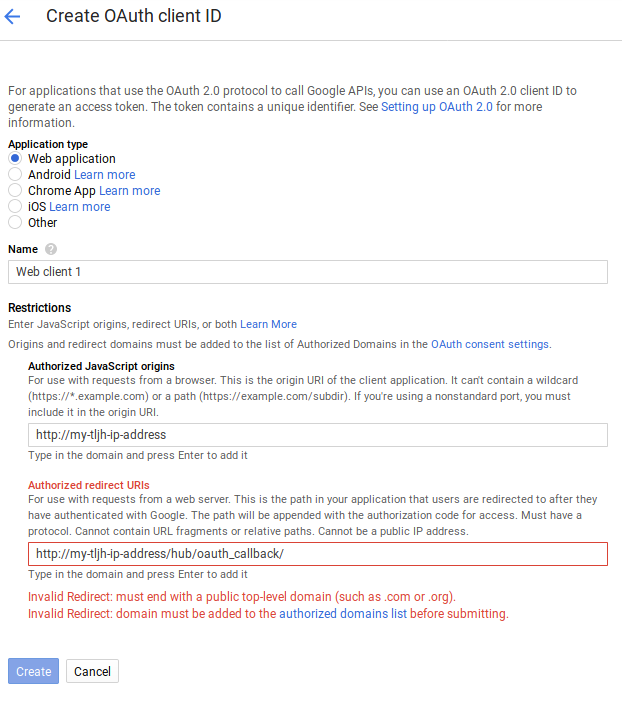
You will have to fill a form with:
Application type: Choose Web application
Name: A descriptive name for your OAuth client ID (e.g.
tljh-client)Authorized JavaScript origins: Use the IP address or URL of your JupyterHub. e.g.
http(s)://<my-tljh-url>.Authorized redirect URIs: Insert text with the following form:
http(s)://<my-tljh-ip-address>/hub/oauth_callback
When you’re done filling in the page, it should look something like this (ideally without the red warnings):
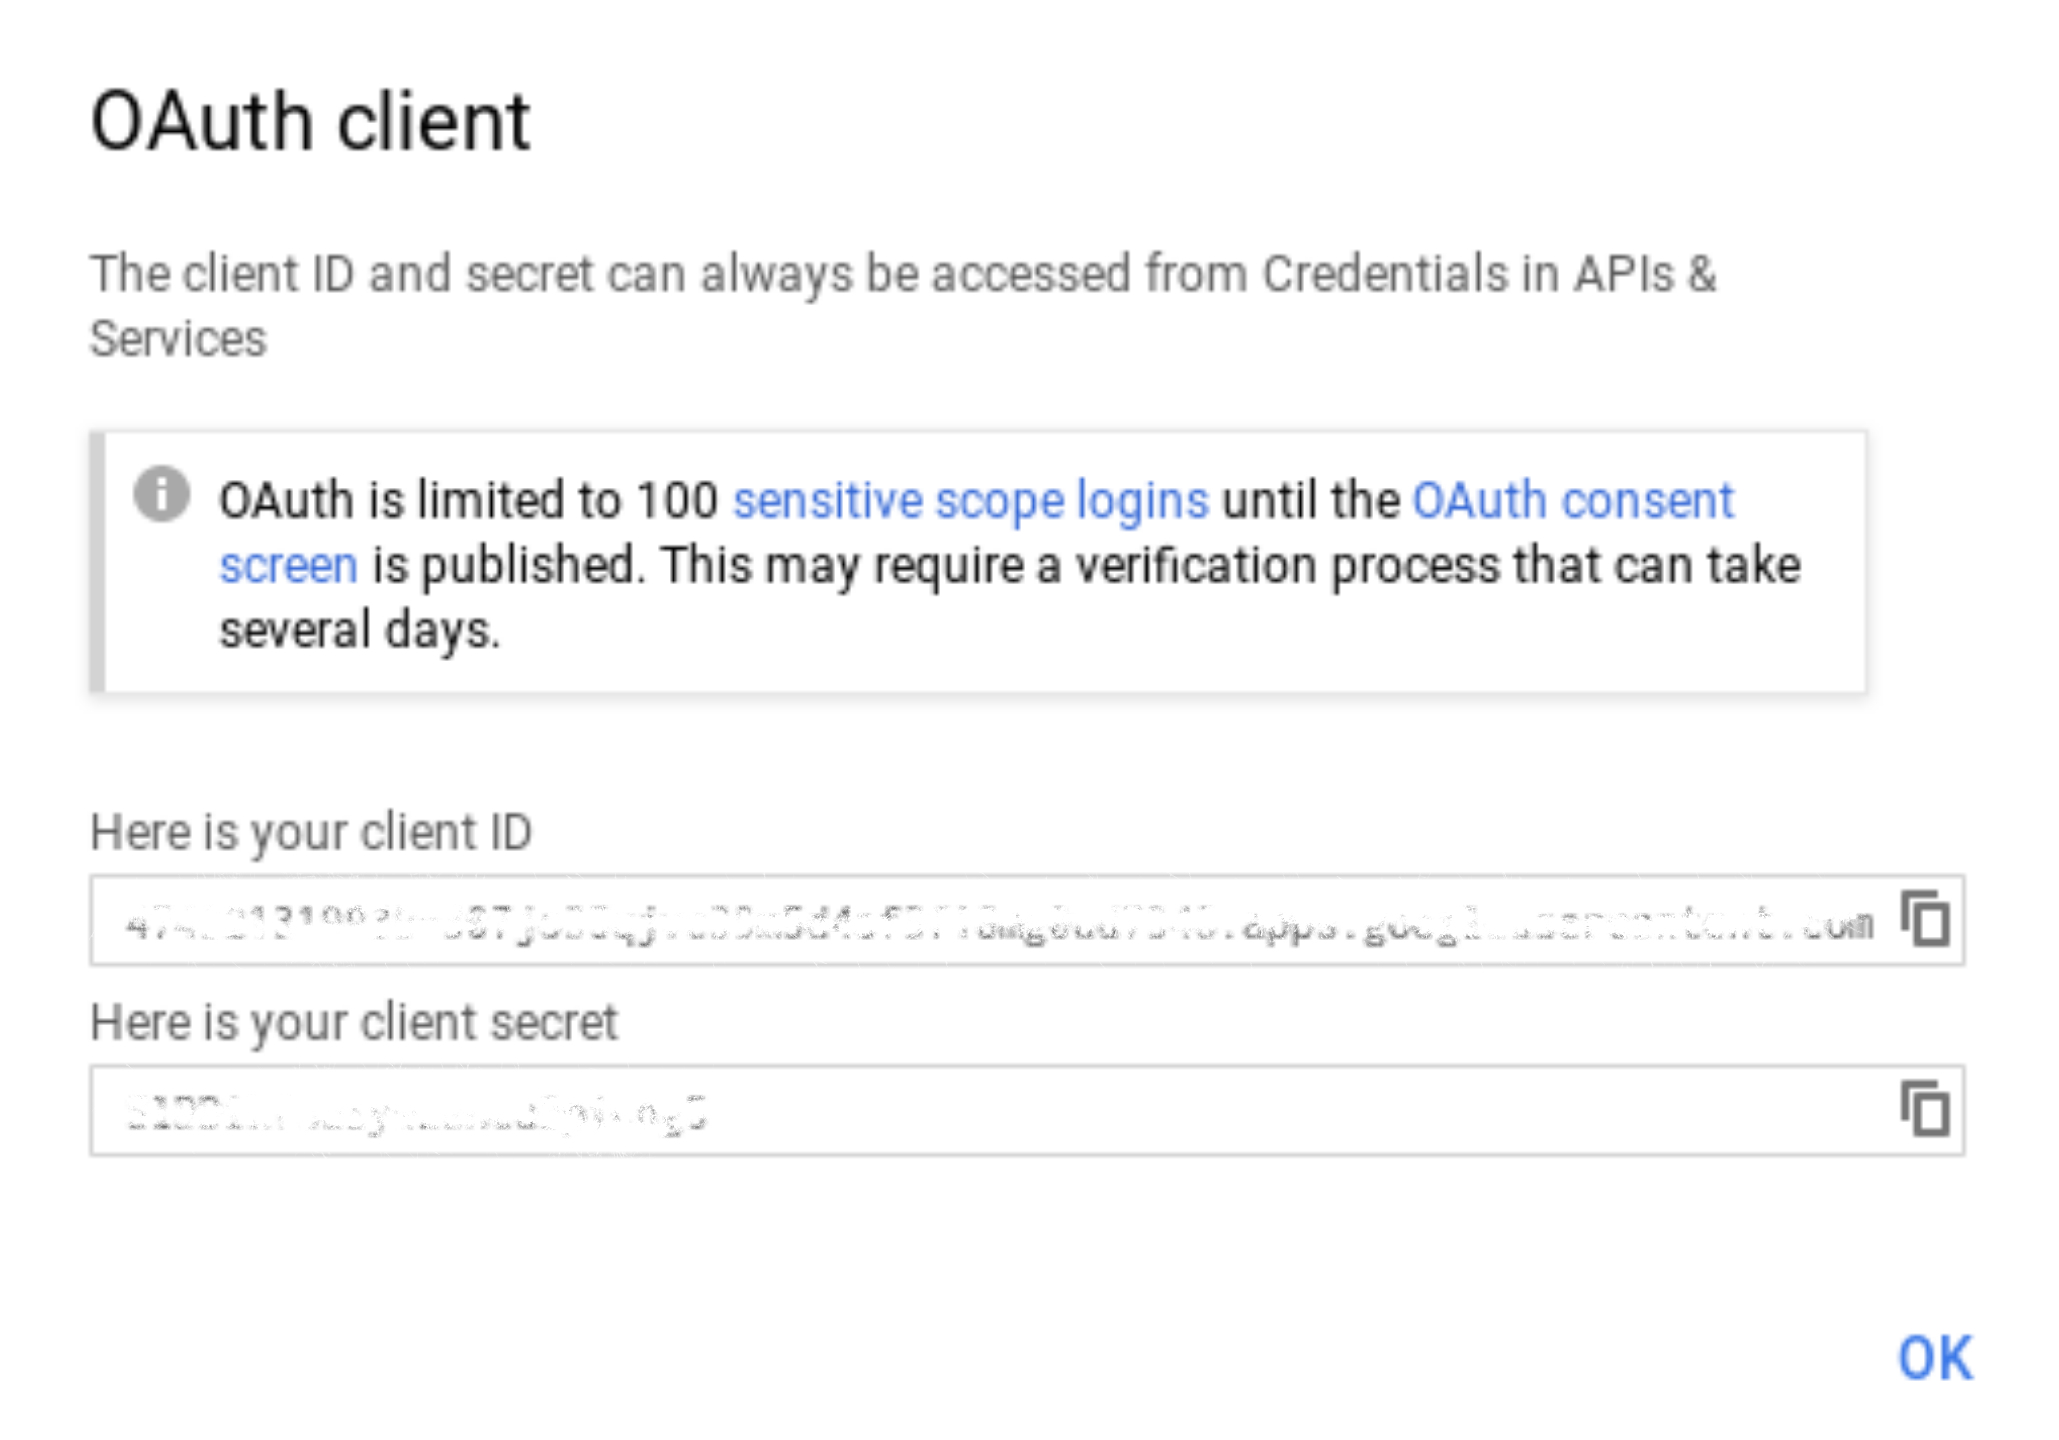
Click “Create”. You’ll be taken to a page with the registered application details.
Copy the Client ID and Client Secret from the application details page. You will use these later to configure your JupyterHub authenticator.
Important
If you are using a virtual machine from a cloud provider and stop the VM, then when you re-start the VM, the provider will likely assign a new public IP address to it. In this case, you must update your Google application information with the new IP address.
Step 3: Configure your JupyterHub to use the Google OAuthenticator#
Configuration with tljh-config#
In this section we’ll use the tljh-config tool to configure your JupyterHub’s authentication.
For more information on tljh-config, see Configuring TLJH with tljh-config.
Important
By default, the following allows anyone with a Google account to login. You can set specific allowed users and admins using User Lists.
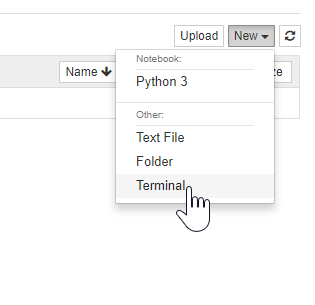
Log in as an administrator account to your JupyterHub.
Open a terminal window.
Configure the Google OAuthenticator to use your client ID, client secret and callback URL with the following commands:
sudo tljh-config set auth.GoogleOAuthenticator.client_id '<my-tljh-client-id>'
sudo tljh-config set auth.GoogleOAuthenticator.client_secret '<my-tljh-client-secret>'
sudo tljh-config set auth.GoogleOAuthenticator.oauth_callback_url 'http(s)://<my-tljh-ip-address>/hub/oauth_callback'
Tell your JupyterHub to use the Google OAuthenticator for authentication:
sudo tljh-config set auth.type oauthenticator.google.GoogleOAuthenticator
Restart your JupyterHub so that new users see these changes:
sudo tljh-config reload
Advanced Configuration with Google Groups#
Administrative and regular users of your TLJH can also be easily managed with Google Groups. This requires a service account and a Workspace admin account that can be impersonated by the service account to read groups in your domain. You may need to contact your Google Workspace administrator for help performing these steps.
Create a service account key. Keep this key in a safe space, you will need to add it to your instance later.
Setup domain-wide delegation for the service account that includes the following scopes:
https://www.googleapis.com/auth/admin.directory.user.readonly
https://www.googleapis.com/auth/admin.directory.group.readonly
Add the service account key to your instance and ensure it is not readable by non-admin users of the hub.
Important
The service account key is a secret. Anyone for whom you configure admin privileges on your TLJH instance will be able to access it.
Log in as an administrator account to your JupyterHub.
Open a terminal window.
Install the extra requirements within the hub environment.
source /opt/tljh/hub/bin/activate
pip3 install oauthenticator[googlegroups]
deactivate
Create a configuration directory
jupyterhub_config.dwithin/opt/tljh/config/. Any.pyfiles within this directory will be sourced for configuration.sudo mkdir /opt/tljh/config/jupyterhub_config.d
Configure your hub for Google Groups-based authentication by adding the following to a
.pyfile within/opt/tljh/config/jupyterhub_config.d.from oauthenticator.google import GoogleOAuthenticator c.JupyterHub.authenticator_class = GoogleOAuthenticator c.GoogleOAuthenticator.google_service_account_keys = {'<my-domain.com>': '</path/to/your/service_account_key.json>'} c.GoogleOAuthenticator.gsuite_administrator = {'<my-domain.com>': '<my-gsuite-admin>'} c.GoogleOAuthenticator.allowed_google_groups = {'<my-domain.com>': ['example-group', 'another-example-group']} c.GoogleOAuthenticator.admin_google_groups = {'<my-domain.com>': ['example-admin-group', 'another-example-admin-group']} c.GoogleOAuthenticator.client_id = '<my-tljh-client-id>' c.GoogleOAuthenticator.client_secret = '<my-tljh-client-secret>' c.GoogleOAuthenticator.hosted_domain = '<my-domain.com>' c.GoogleOAuthenticator.login_service = '<my-login-service>' c.GoogleOAuthenticator.oauth_callback_url = 'http(s)://<my-tljh-ip-address>/hub/oauth_callback'
See the Google OAuthenticator documentation for more information on these and other configuration options.
Reload your configuration for the changes to take effect:
sudo tljh-config reload
Step 4: Confirm that the new authenticator works#
Open an incognito window in your browser (do not log out until you confirm that the new authentication method works!)
Go to your JupyterHub URL.
You should see a Google login button like below:

After you log in with your Google credentials, you should be directed to the Jupyter interface used in this JupyterHub.
If this does not work you can revert back to the default JupyterHub authenticator by following the steps in Let users choose a password when they first log in.